Installing Listmonk - Self-hosted Newsletter and Mailing List Manager
As a tech-enthusiast content creator, I'm always on the lookout for innovative ways to connect with my audience and share my passion for technology and self-sufficiency.
But as my newsletter grew in popularity, I found myself struggling with the financial burden of relying on external services like Mailgun - a problem many creators face when trying to scale their outreach efforts without sacrificing quality.
That's when I discovered Listmonk, a free and open-source mailing list manager that not only promises high performance but also gives me complete control over my data.
In this article, I'll walk you through how I successfully installed and deployed Listmonk locally using Docker, sharing my experiences and lessons learned along the way.
I used Linode's cloud server to test the scenario. You may try either of Linode or DigitalOcean or your own servers.
Get started on Linode with a $100, 60-day credit for new users.

Get started on DigitalOcean with a $100, 60-day credit for new users.
Prerequisites
Before diving into the setup process, make sure you have the following:
- Docker and Docker Compose installed on your server.
- A custom domain that you want to use for Listmonk.
- Basic knowledge of shell commands and editing configuration files.
If you are absolutely new to Docker, we have a course just for you:

Step 1: Set up the project directory
The first thing you need to do is create the directory where you'll store all the necessary files for Listmonk, I like an organized setup (helps in troubleshooting).
In your terminal, run:
mkdir listmonk
cd listmonk
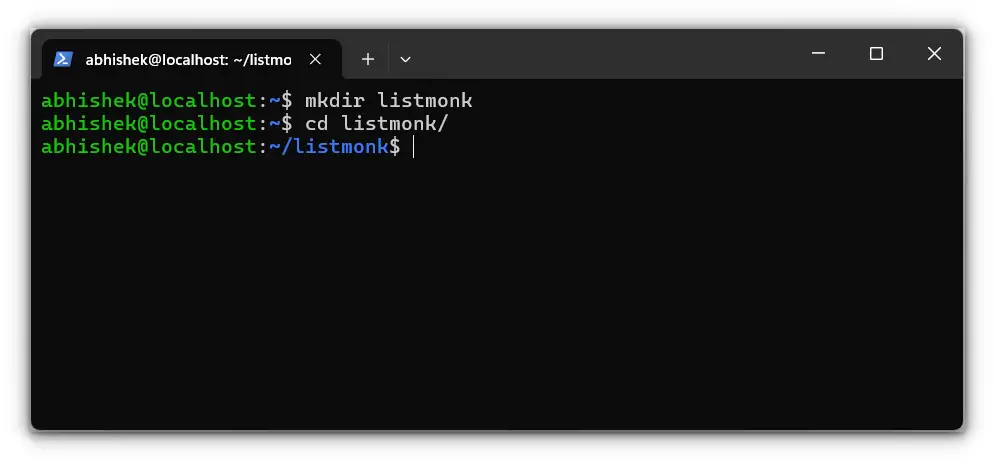
This will set up a dedicated directory for Listmonk’s files.
Step 2: Create the Docker compose file
Listmonk has made it incredibly easy to get started with Docker. Their official documentation provides a detailed guide and even a sample docker-compose.yml file to help you get up and running quickly.
Download the sample file to the current directory:
curl -LO https://github.com/knadh/listmonk/raw/master/docker-compose.yml
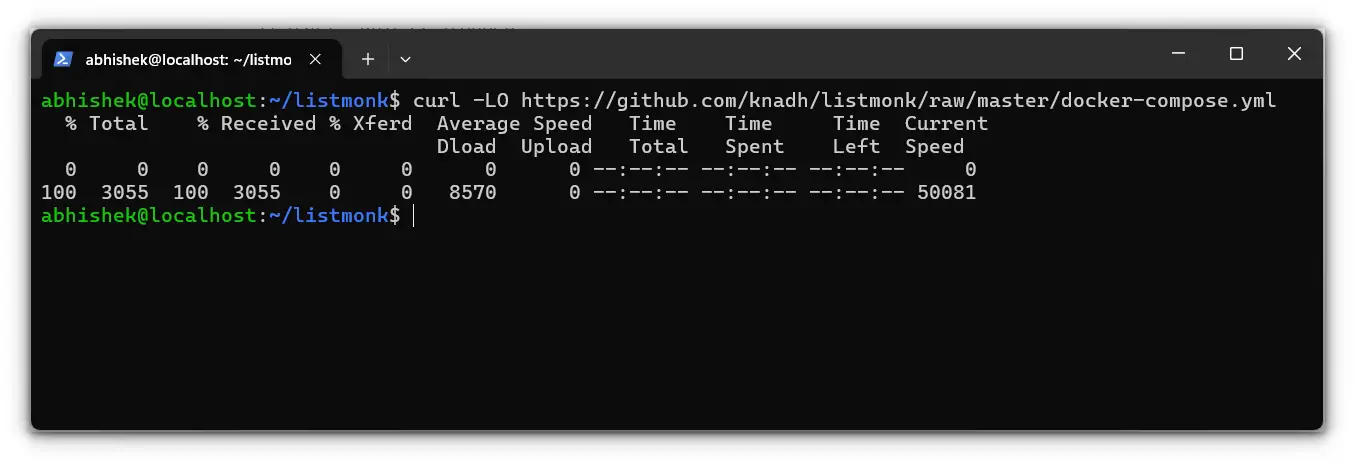
Here is the sample docker-compose.yml file, I tweaked some default environment variables:
.env file, not hardcoded in your docker-compose.yml. I know, I know, I did it for this tutorial... but you're smarter than that, right? 😉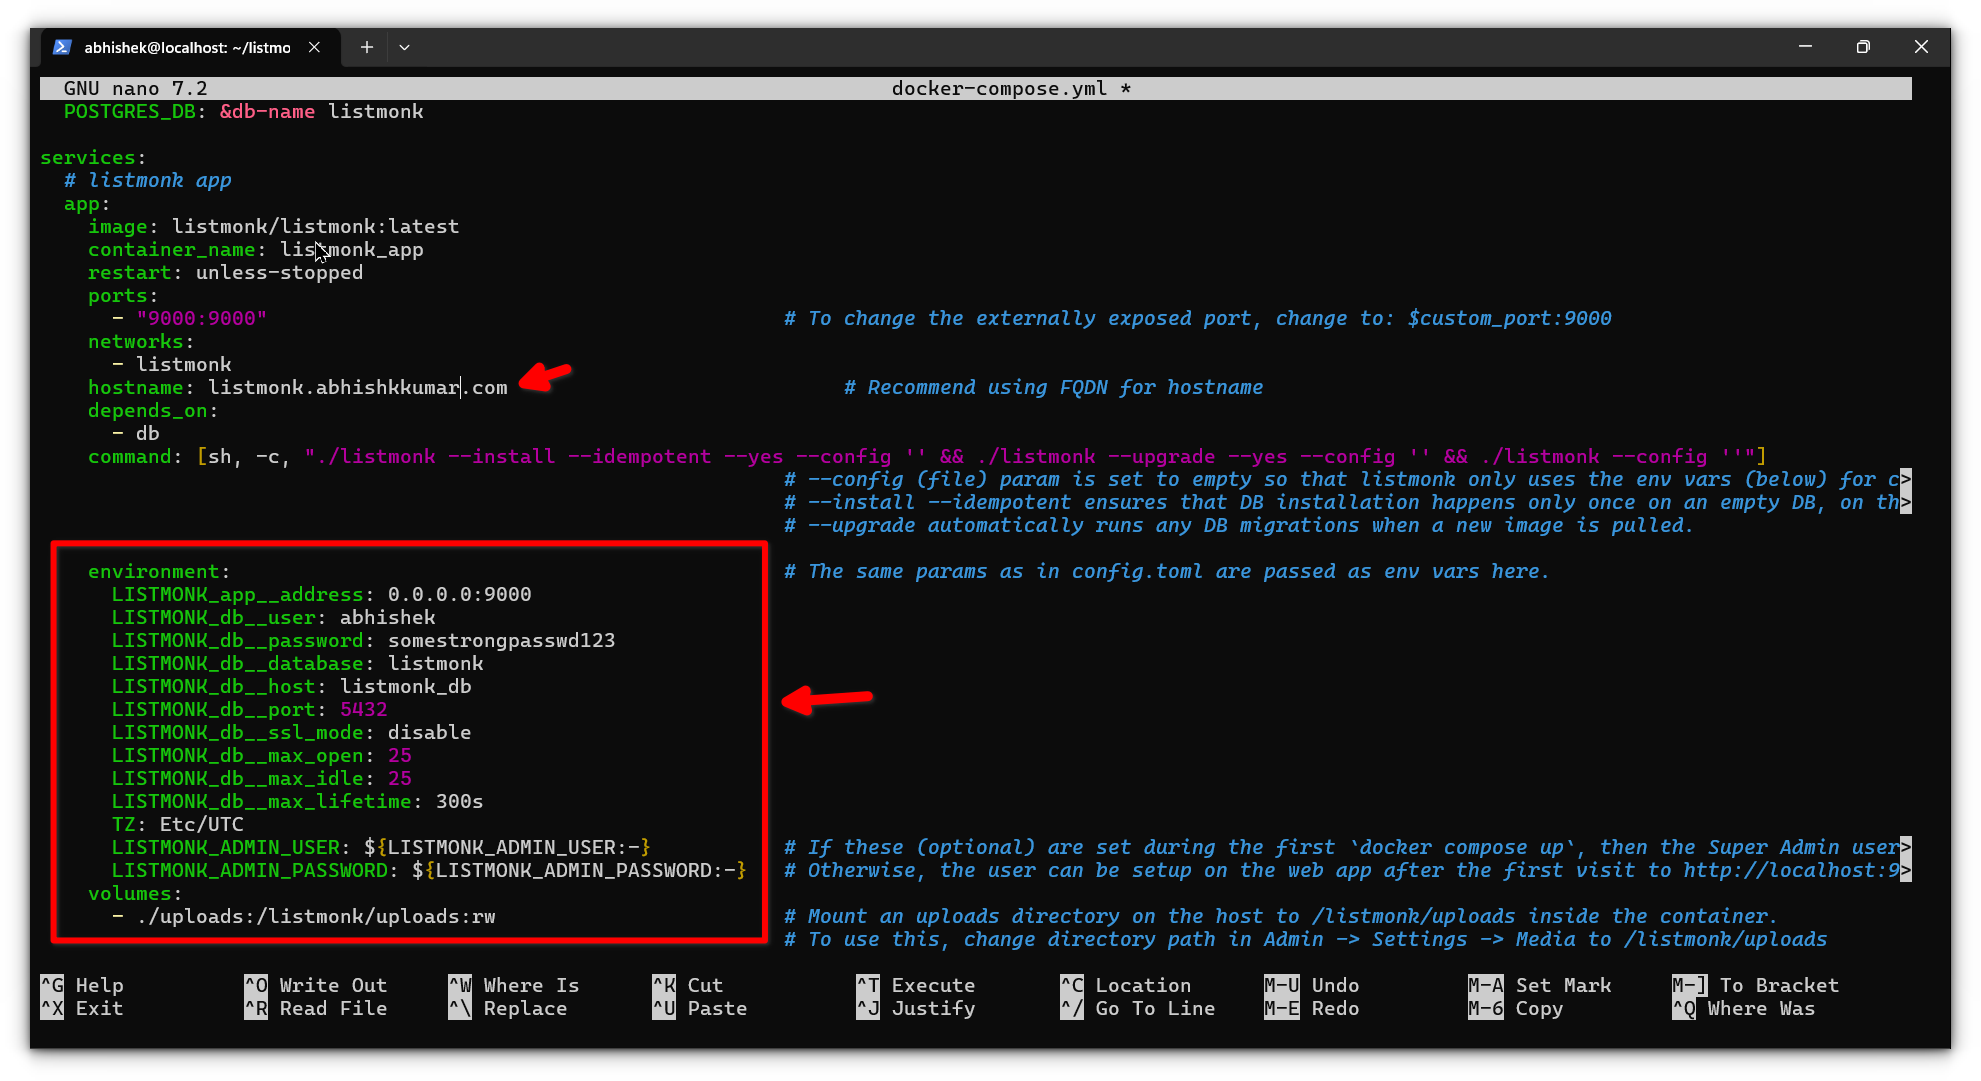
For most users, this setup should be sufficient but you can always tweak settings to your own needs.
then run the container in the background:
docker compose up -d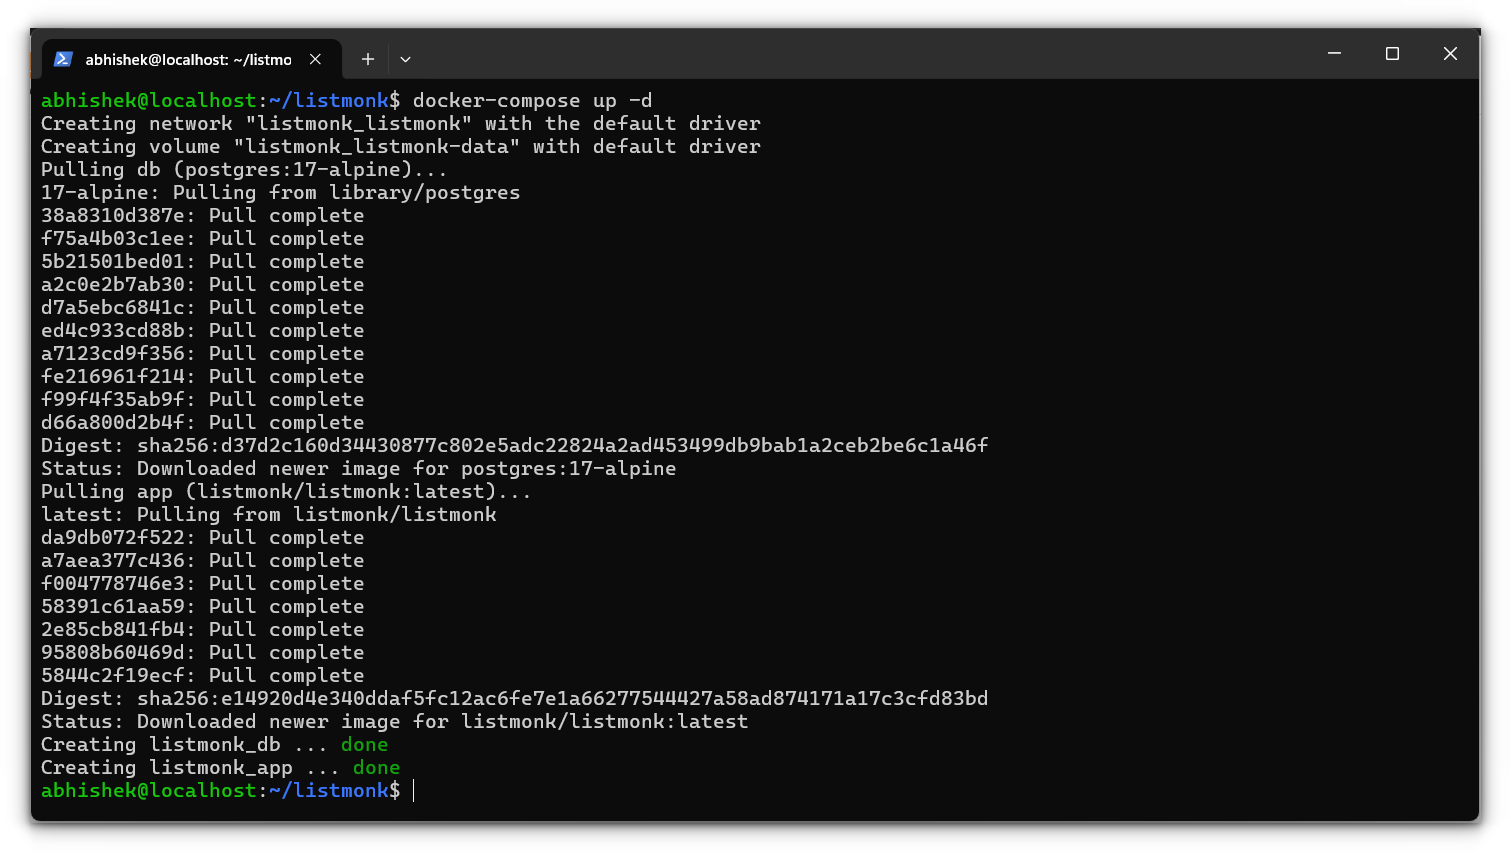
Once you've run these commands, you can access Listmonk by navigating to http://localhost:9000 in your browser.
Setting up SSL
By default, Listmonk runs over HTTP and doesn’t include built-in SSL support. It is kinda important if you are running any service these days. So the next thing we need to do is to set up SSL support.
While I personally prefer using Cloudflare Tunnels for SSL and remote access, this tutorial will focus on Caddy for its straightforward integration with Docker.
Start by creating a folder named caddy in the same directory as your docker-compose.yml file:
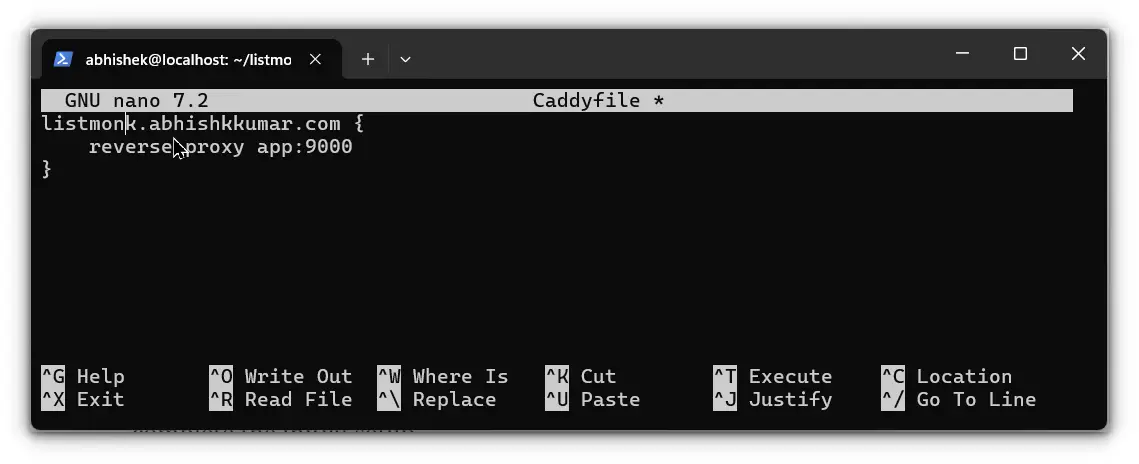
mkdir caddyInside the caddy folder, create a file named Caddyfile with the following content:th the following contents:
listmonk.example.com {
    reverse_proxy app:9000
}
Replace listmonk.example.com with your actual domain name. This tells Caddy to proxy requests from your domain to the Listmonk service running on port 9000.
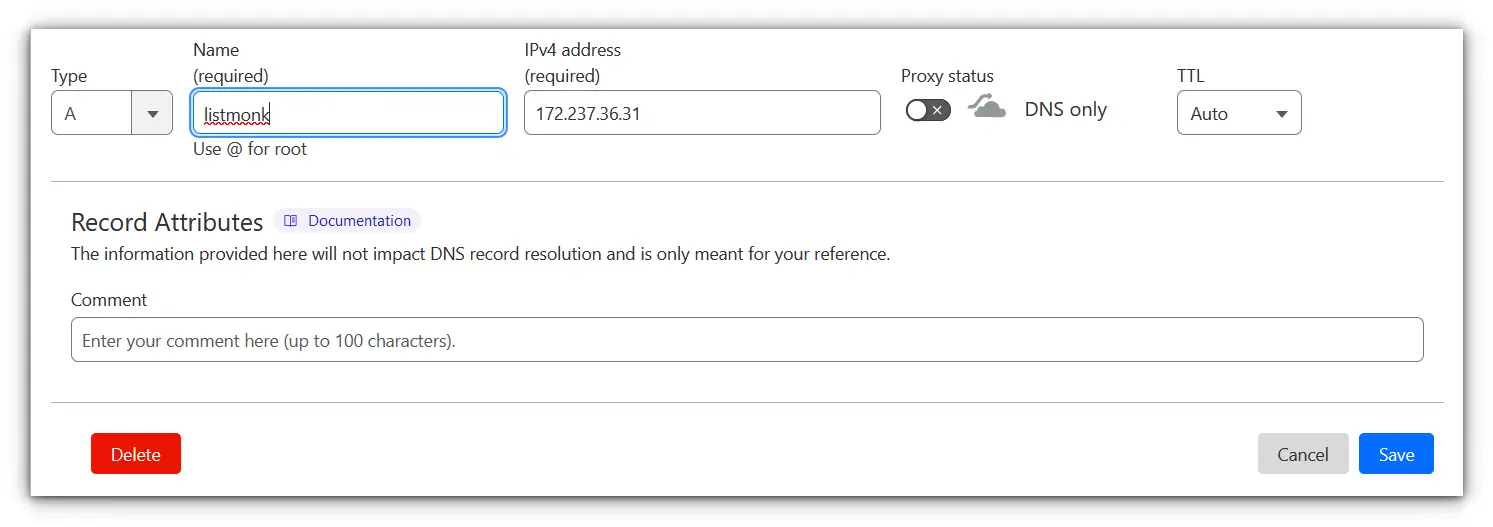
Ensure your domain is correctly configured in DNS. Add an A record pointing to your server's IP address (in my case, the Linode server's IP).
If you’re using Cloudflare, set the proxy status to DNS only during the initial setup to let Caddy handle SSL certificates.
Next, add the Caddy service to your docker-compose.yml file. Here’s the configuration to include:
  caddy:
    image: caddy:latest
    restart: unless-stopped
    container_name: caddy
    ports:
      - 80:80
      - 443:443
    volumes:
      - ./caddy/Caddyfile:/etc/caddy/Caddyfile
      - ./caddy/caddy_data:/data
      - ./caddy/caddy_config:/config
    networks:
      - listmonk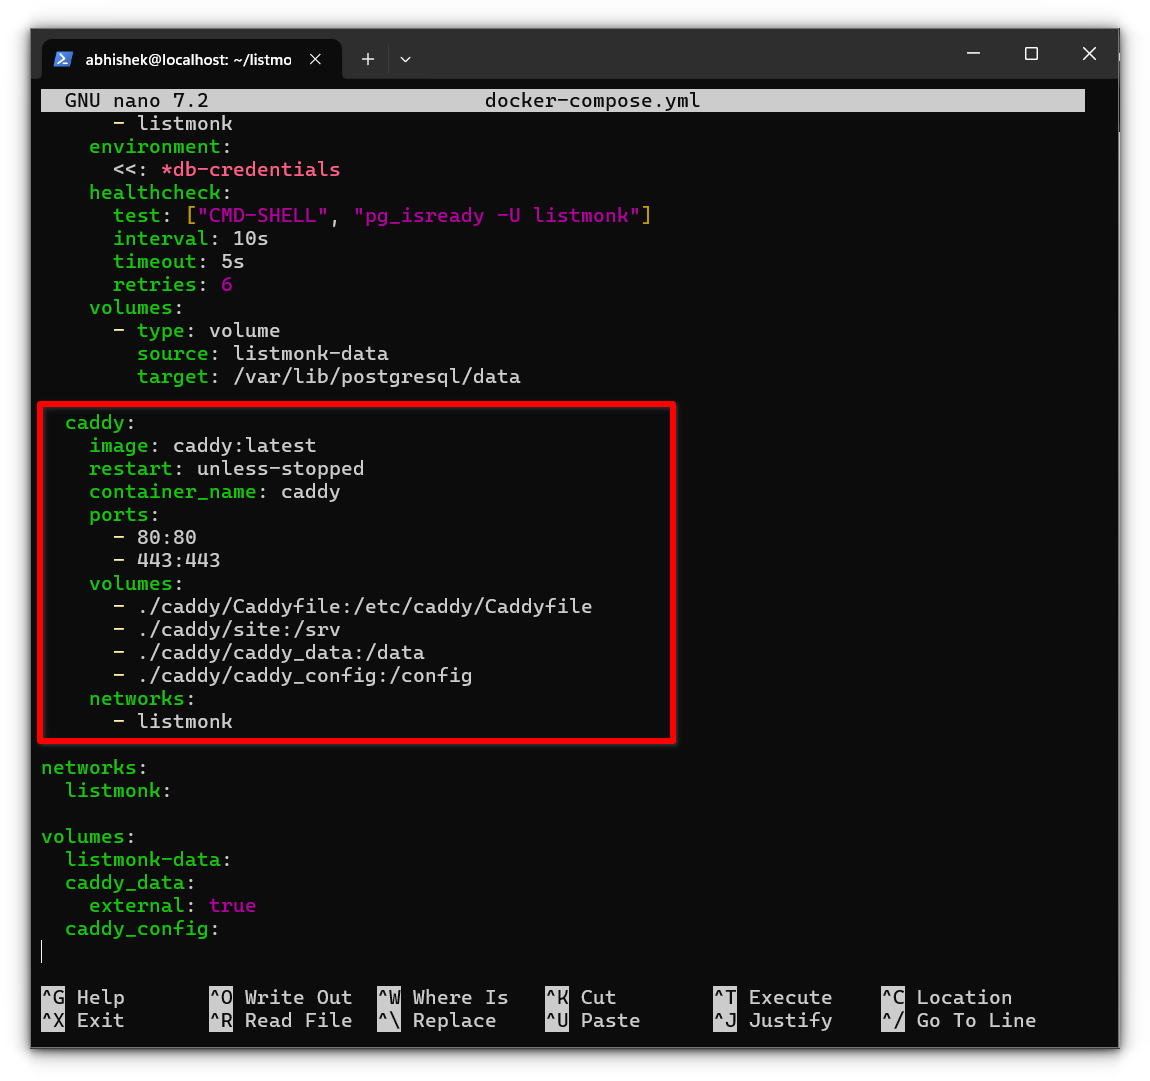
This configuration sets up Caddy to handle HTTP (port 80) and HTTPS (port 443) traffic, automatically obtain SSL certificates, and reverse proxy requests to the Listmonk container.
Finally, restart your containers to apply the new settings:
docker-compose restartOnce the containers are up and running, navigate to your domain (e.g., https://listmonk.example.com) in a browser.
Caddy will handle the SSL certificate issuance and proxy the traffic to Listmonk seamlessly.
Step 3: Accessing Listmonk webUI
Once Listmonk is up and running, it’s time to access the web interface and complete the initial setup.
Open your browser and navigate to your domain or IP address where Listmonk is hosted. If you’ve configured HTTPS, the URL should look something like this:
https://listmonk.yourdomain.com
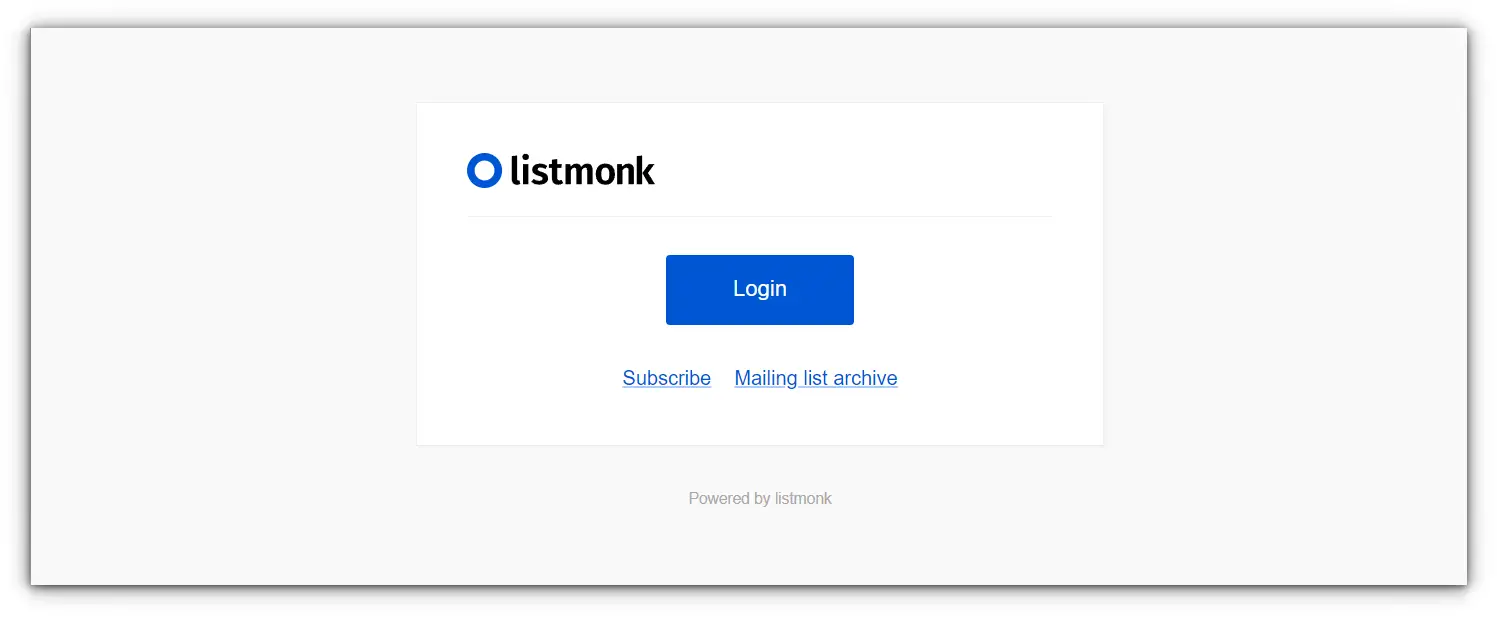
and you’ll be greeted with the login page. Click Login to proceed.
Creating the admin user
On the login screen, you’ll be prompted to create an administrator account. Enter your email address, a username, and a secure password, then click Continue.
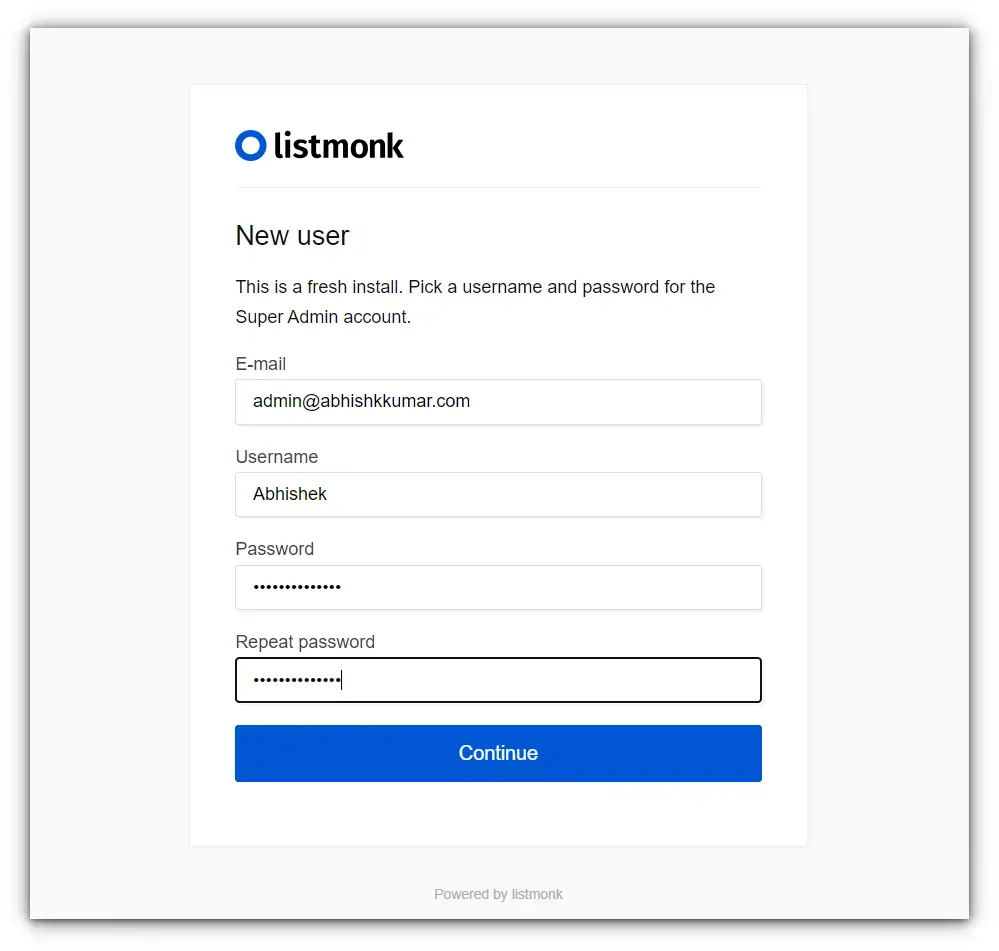
This account will serve as the primary admin for managing Listmonk.
Configure general settings
Once logged in, navigate to Settings > Settings in the left sidebar. Under the General tab, customize the following:
- Site Name: Enter a name for your Listmonk instance.
- Root URL: Replace the default
http://localhost:9000with your domain (e.g.,https://listmonk.yourdomain.com). - Admin Email: Add an email address for administrative notifications.
Click Save to apply these changes.
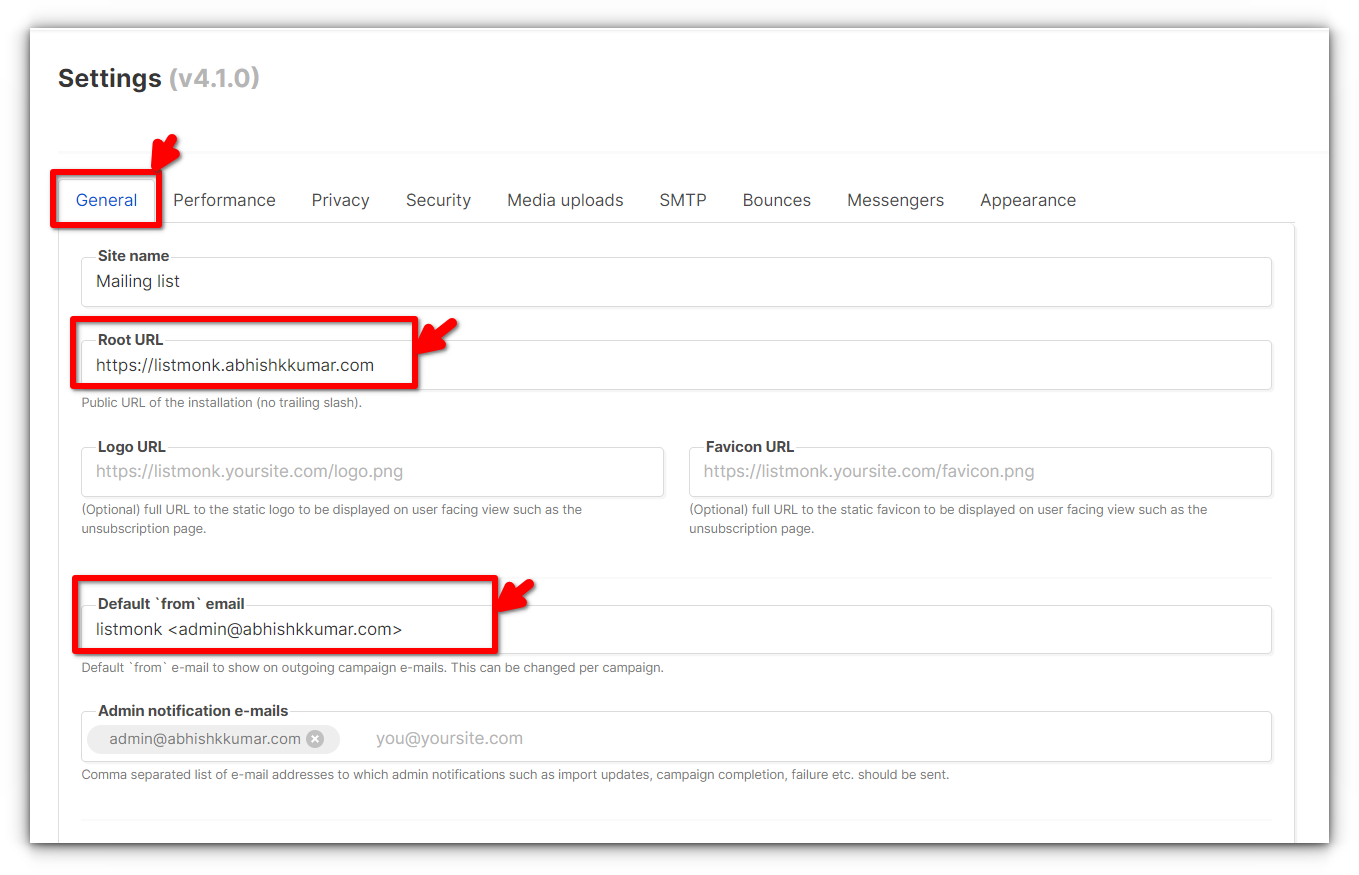
Configure SMTP settings
To send emails, you’ll need to configure SMTP settings:
- Click on the SMTP tab in the settings.
- Fill in the details:
- Host:
smtp.emailhost.com - Port:
465 - Auth Protocol:
Login - Username: Your email address
- Password: Your email password (or Gmail App password, generated via Google’s security settings)
- TLS:
SSL/TLS
- Host:
- Click Save to confirm the settings.
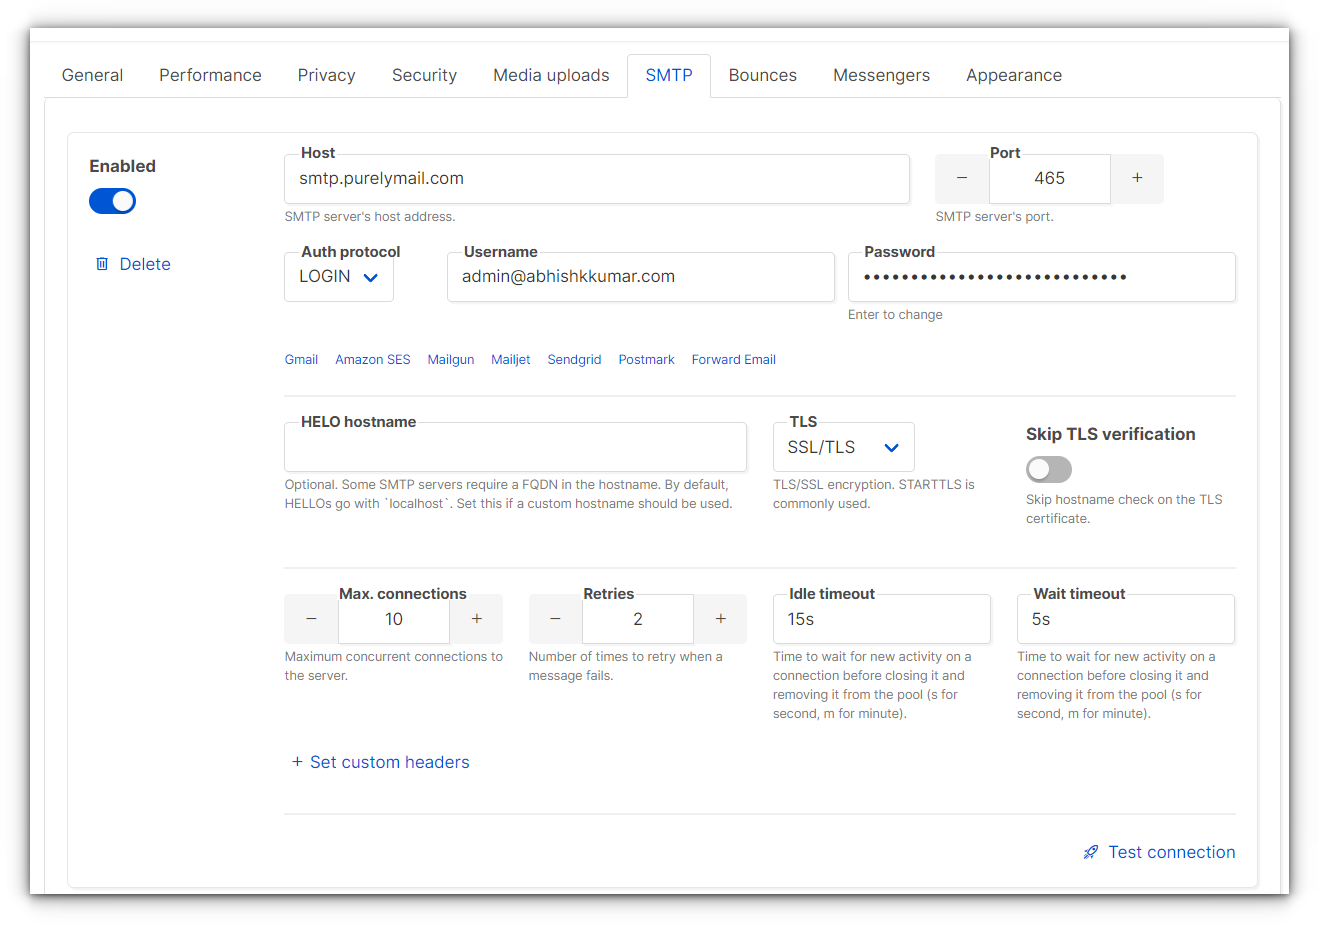
Create a new campaign list
Now, let’s create a list to manage your subscribers:
- Go to All Lists in the left sidebar and click + New.
- Give your list a name, set it to Public, and choose between Single Opt-In or Double Opt-In.
- Add a description, then click Save.
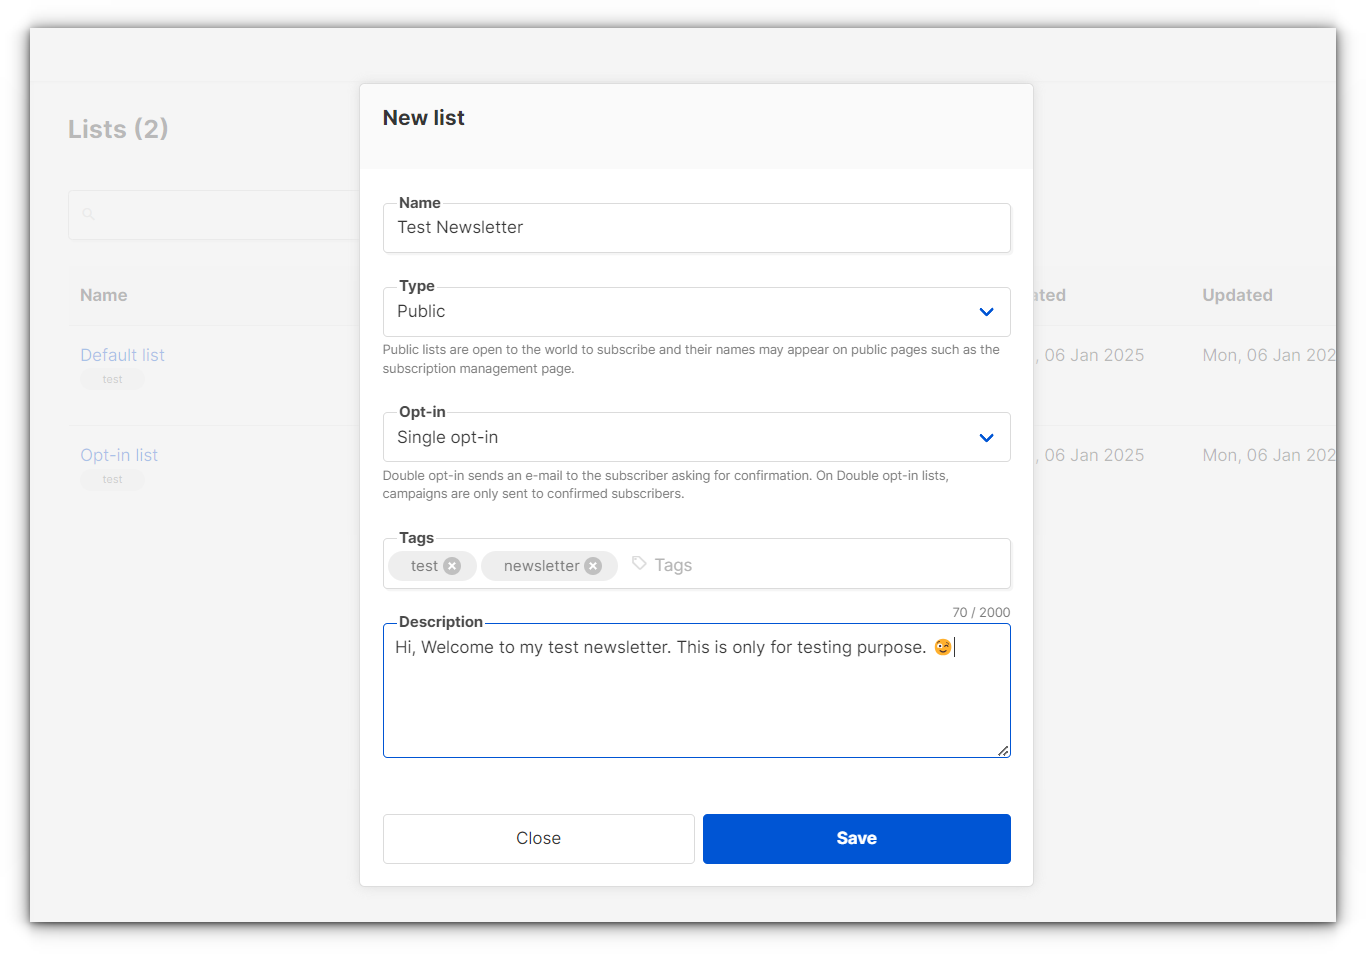
Your newsletter subscription form will now be available at:
https://listmonk.yourdomain.com/subscription/form
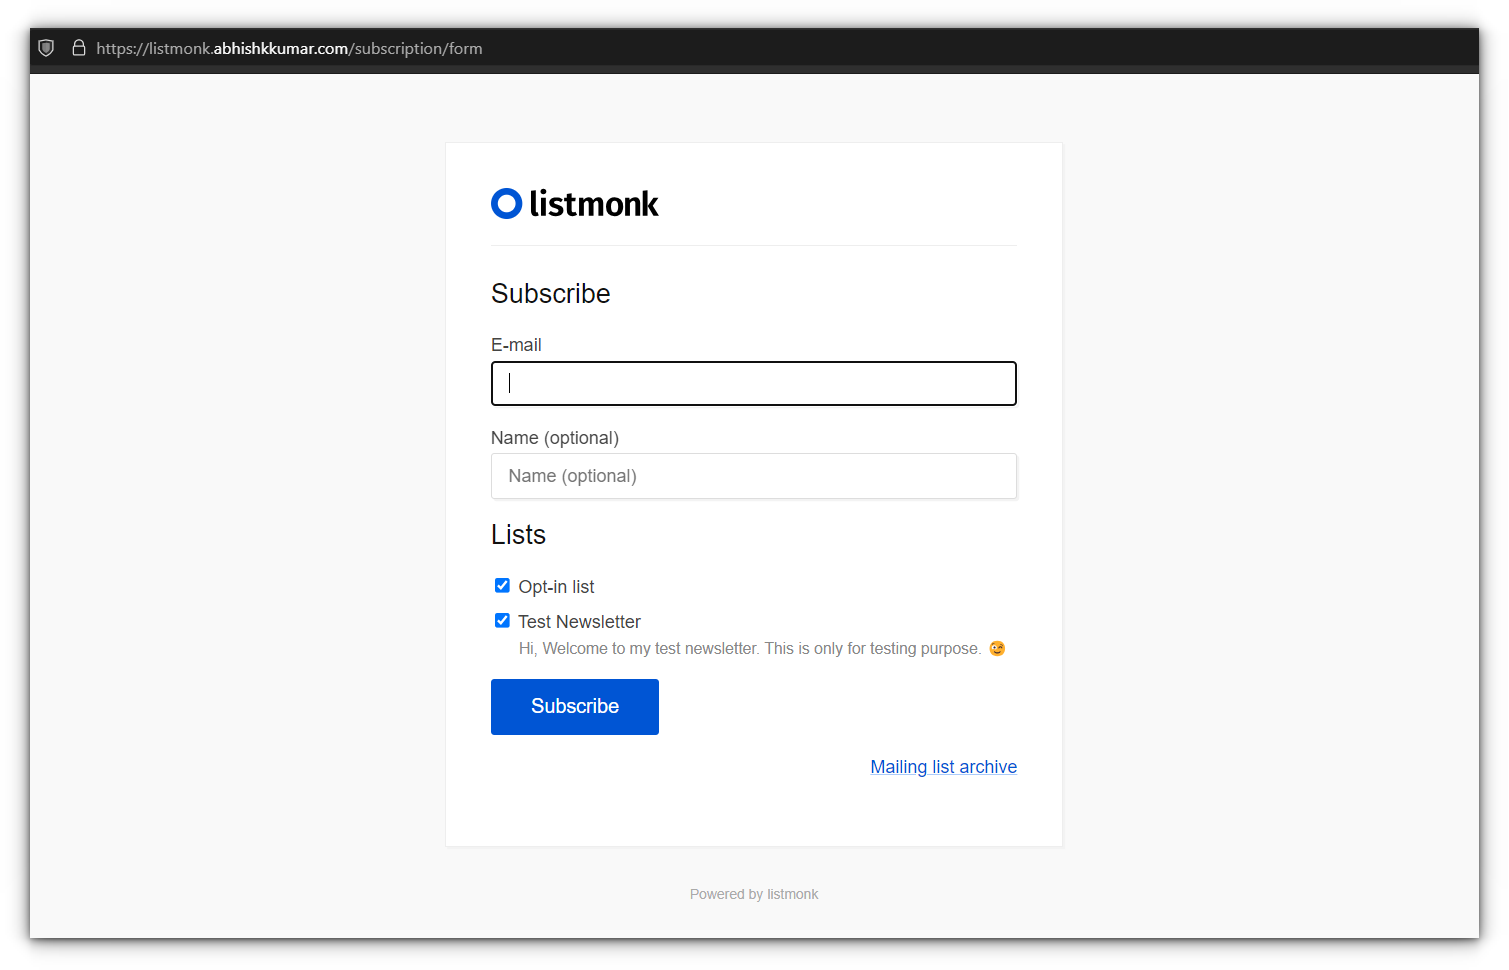
With everything set up and running smoothly, it’s time to put Listmonk to work.
You can easily import your existing subscribers, customize the look and feel of your emails, and even change the logo to match your brand.
Final thoughts
And that’s it! You’ve successfully set up Listmonk, configured SMTP, and created your first campaign list. From here, you can start sending newsletters and growing your audience.
I’m currently testing Listmonk for my own newsletter solution on my website, and while it’s a robust solution, I’m curious to see how it performs in a production environment.
That said, I’m genuinely impressed by the thought and effort that Kailash Nadh and the contributors have put into this software, it’s a remarkable achievement.
For any questions or challenges you encounter, the Listmonk GitHub page is an excellent resource and the developers are highly responsive.
Finally, I’d love to hear your thoughts! Share your feedback, comments, or suggestions below. I’d love to hear about your experience with Listmonk and how you’re using it for your projects.
Happy emailing! 📨
https://linuxhandbook.com/content/images/2025/01/listmon-self-hosting.png


Recommended Comments