Handling Indentation in VS Code
By Blogger
· 163 views
Wed, 14 May 2025 03:14:27 GMT

Indentation is how code is visually spaced. It helps define structure, scope, and readability. For example, Python requires indentation to define blocks of code.
Other languages might not require it, but messy indentation can make code really hard to read (and debug). Common indentation styles include:
- 2 spaces (popular in JS, HTML, CSS)
- 4 spaces (common in Python, Java)
- Tabs (some devs swear by them)
VS Code lets you customize indentation per file, per language, or globally.
Let’s explore all the ways to tweak that!
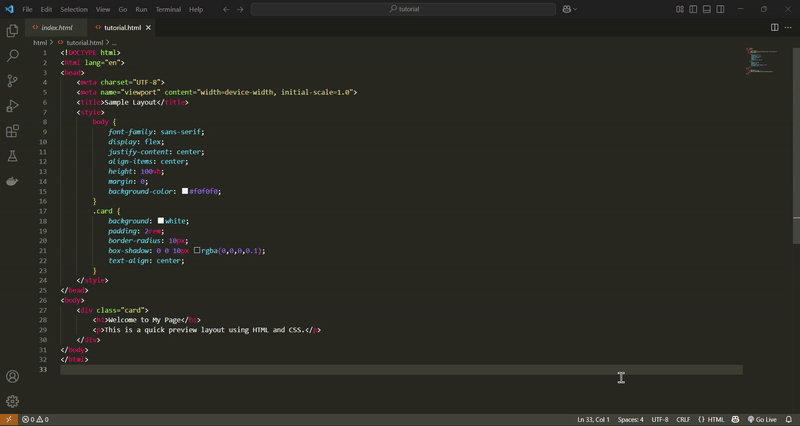
1. Change indentation via the status bar (per-file basis)
This is the easiest method and perfect when you're editing just one file.
- Open a file in VS Code.
- Look at the bottom-right corner of the window. You’ll see something like
Spaces: 4orTab Size: 4.
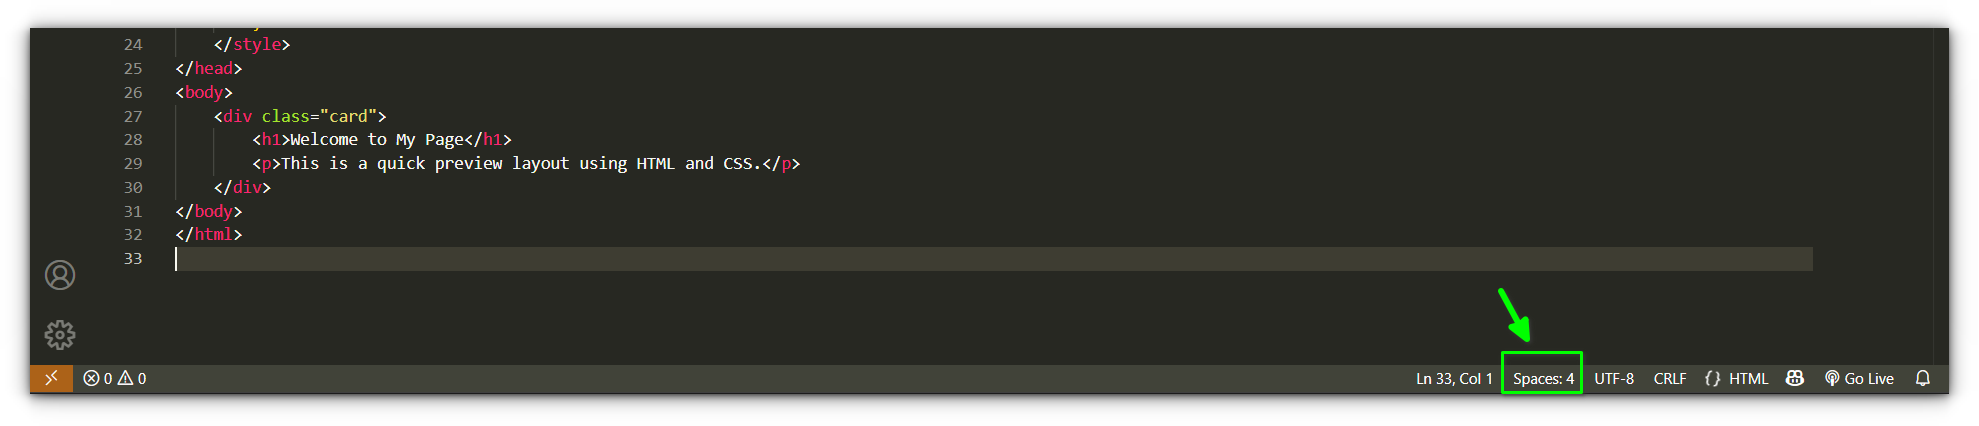
- Click that label, a menu pops up!
Now, you can choose:
- Indent Using Tabs
- Indent Using Spaces
And below that, choose how many spaces (2, 4, 8 - up to you).
Just changing the indentation setting doesn’t automatically re-indent the whole file. You’ll want to reformat the document too.
Here’s how:
- Press
Ctrl + Shift + P(Linux/Windows) orCmd + Shift + P(macOS). - Type
Format Documentand select it.
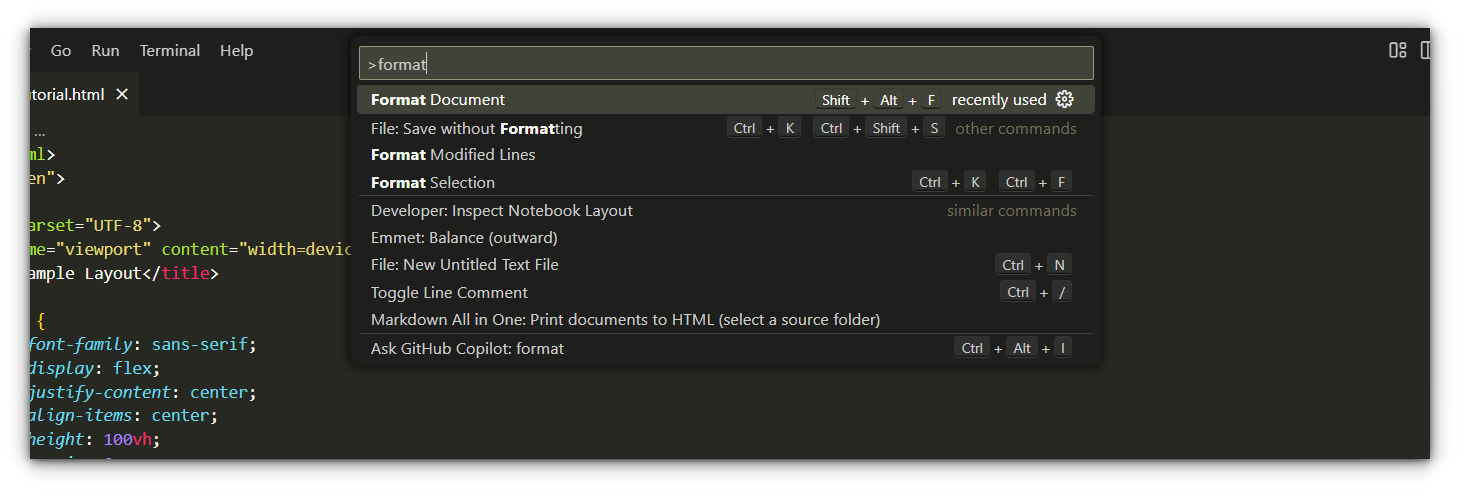
- Or use the shortcut:
Ctrl + Shift + Ion LinuxShift + Alt + Fon WindowsShift + Option + Fon macOS
Boom! The file gets prettied up with your chosen indentation.
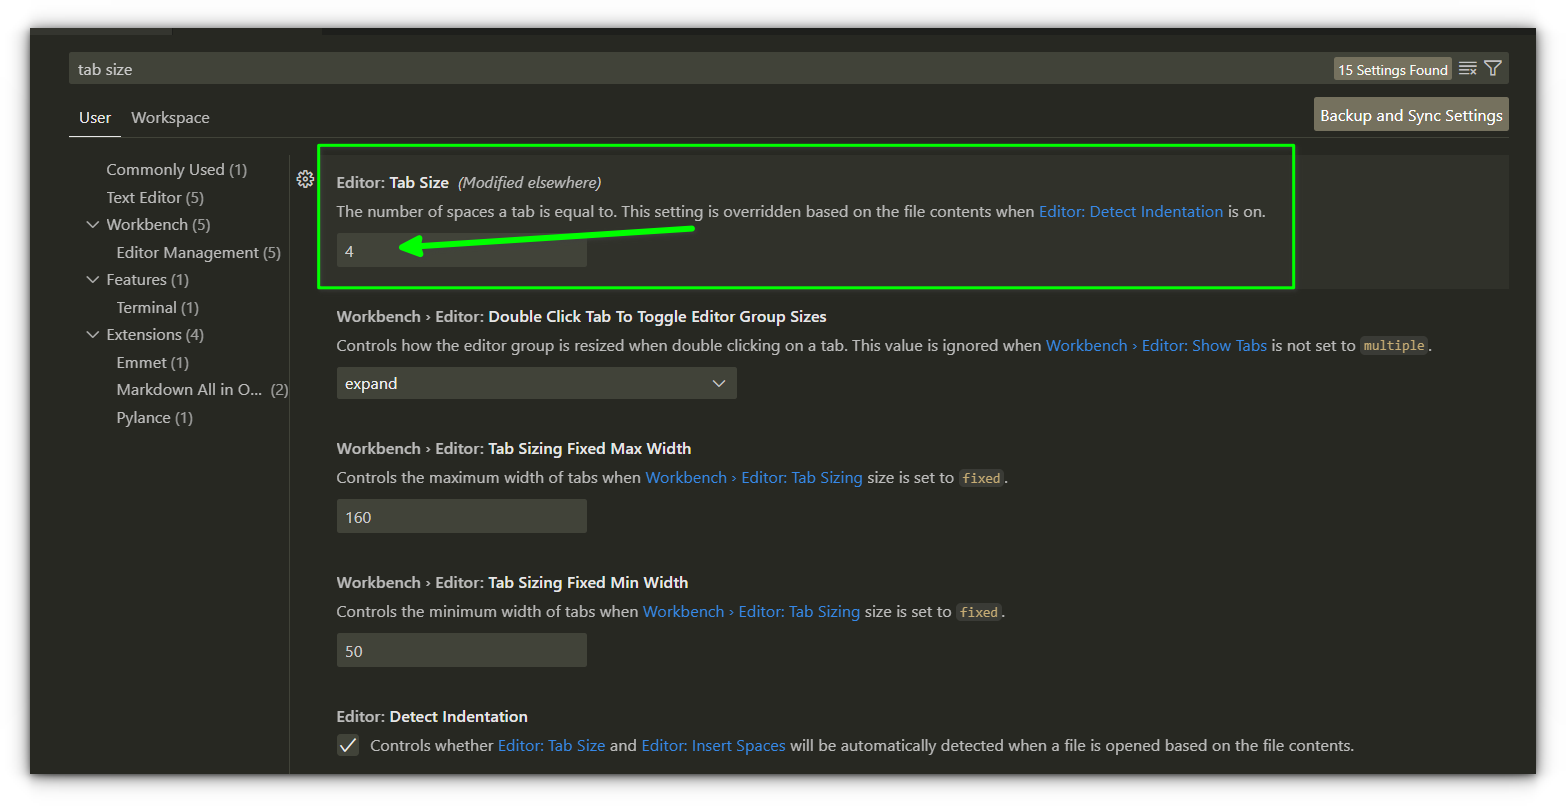
2. Set global indentation in user settings
Want to make your indentation choice apply to all new files in VS Code? Here’s how:
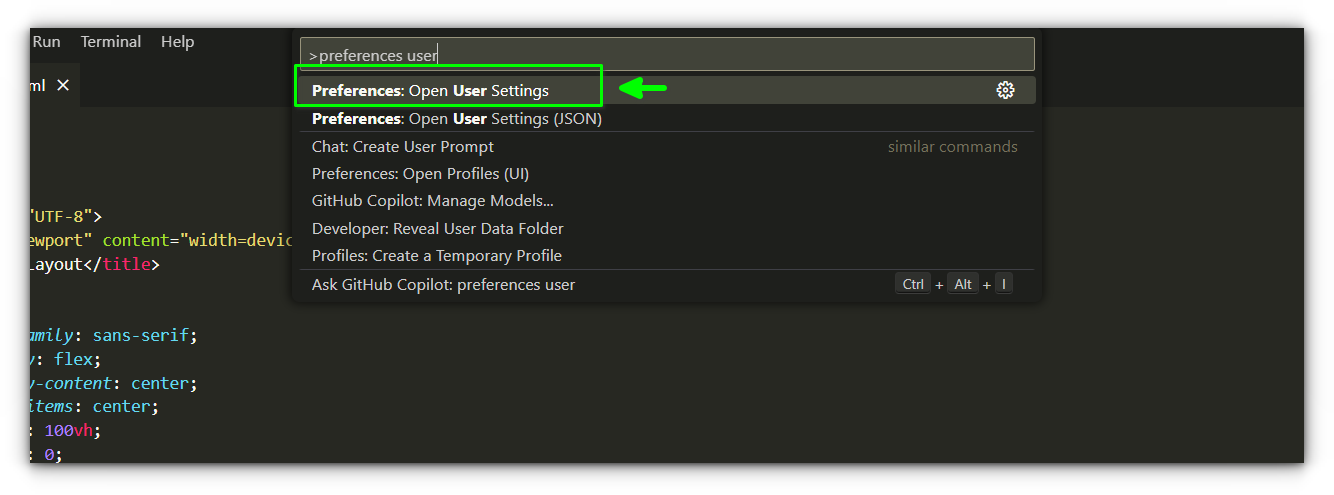
- Open Command Palette with
Ctrl + Shift + PorF1. - Type
Preferences: Open User Settings.
- In the Settings UI, search for Tab Size and set it (e.g., 4).
- Then search Insert Spaces and make sure it’s checked.
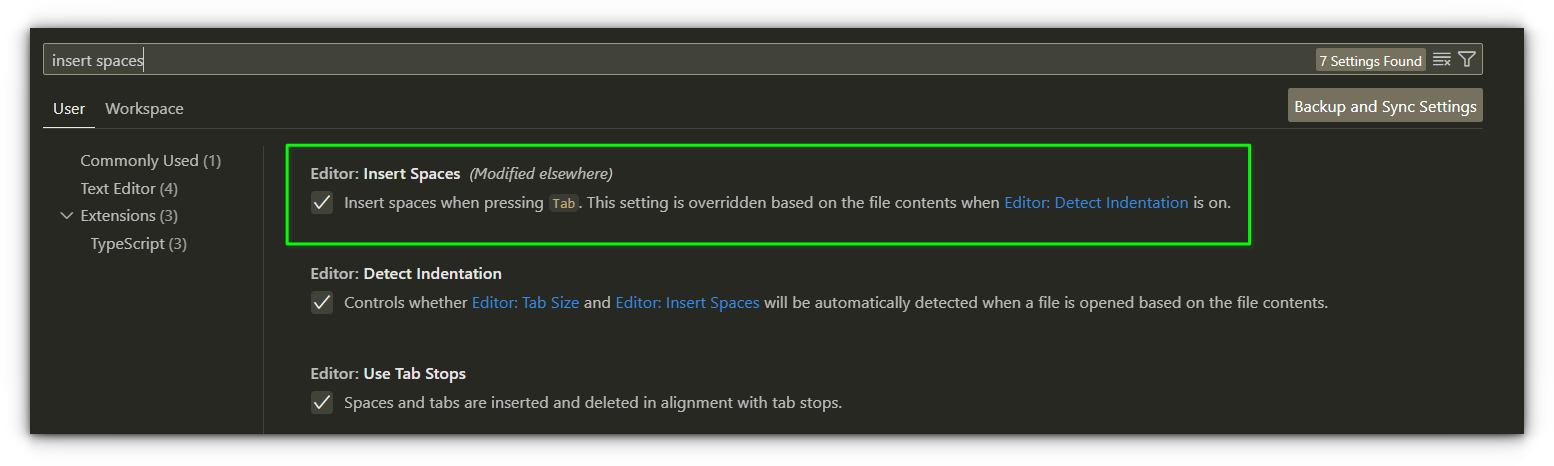
This tells VS Code:
“Whenever I press Tab, insert 4 spaces instead.”
Also check for Detect Indentation, if it’s ON, VS Code will override your settings based on the file content. Disable it if you want consistency across files.
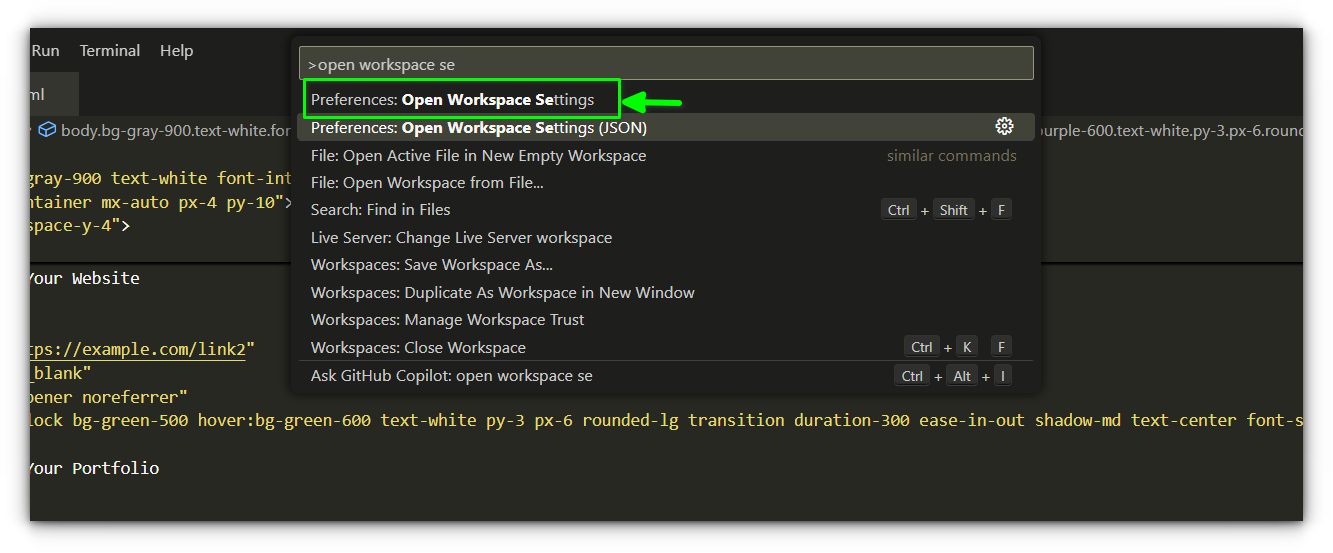
3. Set project-specific indentation (Workspace settings)
Maybe you want different indentation just for one project, not globally.
- Open the project folder in VS Code.
- Go to the Command Palette and select
Preferences: Open Workspace Settings.
- Switch to the
Workspacetab. - Search and set the same Tab Size, Insert Spaces, and Detect Indentation options.
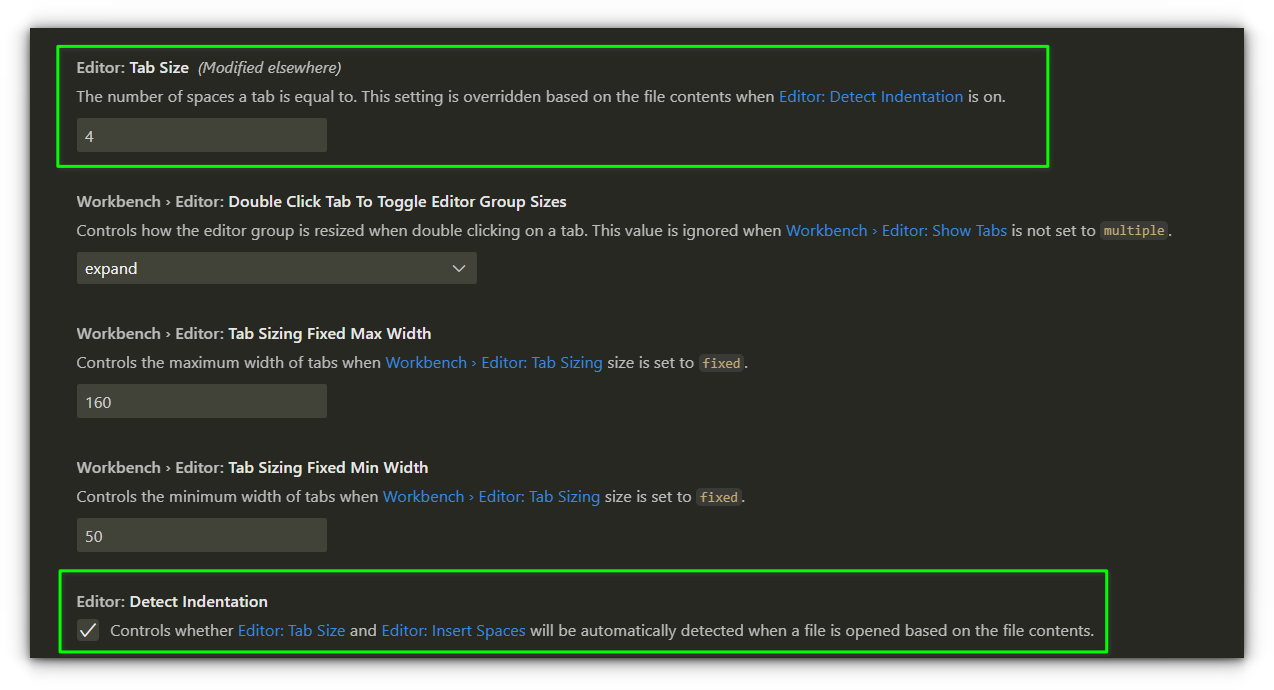
These get saved inside your project’s .vscode/settings.json file.
Perfect if you want 2-space indentation in a JS project but 4 spaces in a Python project you're working on separately.
4. Set indentation based on programming language
Now, here's the power-user move. Let’s say you want:
- 4 spaces for Python
- 2 spaces for JavaScript and TypeScript
Easy!
- Open the Command Palette →
Preferences: Open User Settings (JSON)
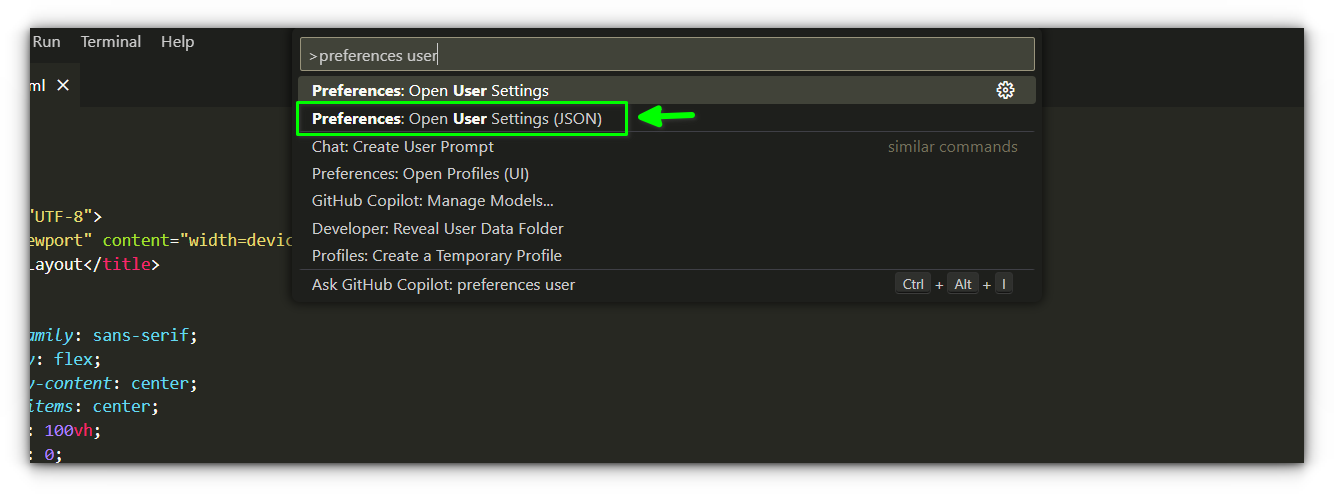
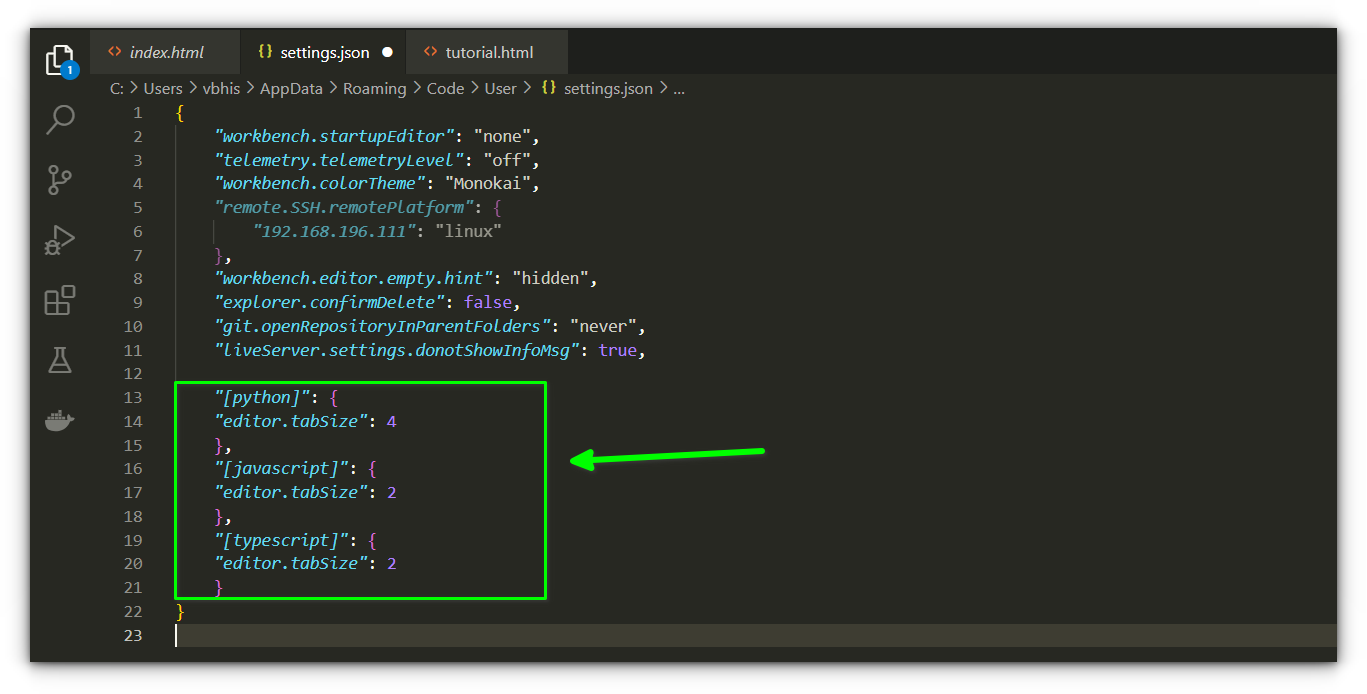
- Add this snippet:
"[python]": {
  "editor.tabSize": 4
},
"[javascript]": {
  "editor.tabSize": 2
},
"[typescript]": {
  "editor.tabSize": 2
}
This overrides the indentation per language.
You can find all language identifiers in the VS Code docs if you want to customize more.
You can also drop this into your .vscode/settings.json file if you want project-level overrides.
Bonus Tip: Convert tabs to spaces (and vice versa)
Already working on a file but the indentation is inconsistent?
- Open the Command Palette → Type
Convert Indentation - Choose either:
Convert Indentation to SpacesConvert Indentation to Tabs
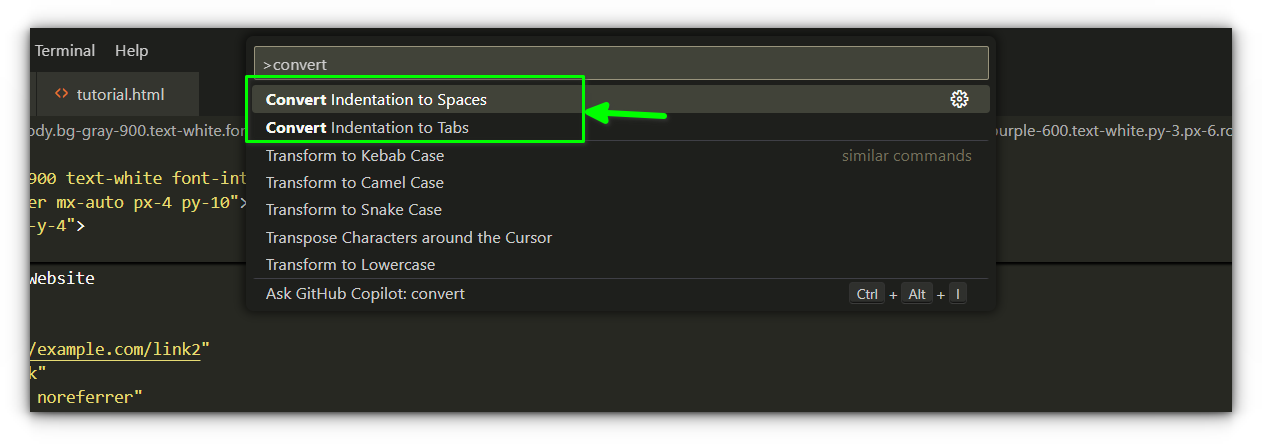
You can also do this from the status bar at the bottom.
If you need to convert all tabs in the file to spaces:
- Press
Ctrl + F - Expand the search box
- Enable Regex (.* icon)
- Search for
\tand replace it with two or four spaces
Wrapping up
Like word wrapping in VS Code, indentation may seem like a small thing, but it's one of the cornerstones of clean, readable code.
Whether you're coding solo or collaborating on big projects, being consistent with indentation helps avoid annoying bugs (especially in Python!) and keeps the codebase friendly for everyone.
VS Code makes it super easy to control indentation your way, whether you want to set it globally, per project, or even per language.
We’ll be back soon with another helpful tip in our VS Code series.
Recommended Comments